Tuesday, December 16, 2014

It's beginning to look a lot like Christmas

We are not inherently religious people - in fact, quite the opposite - but I love Christmas. I don't identify as a Christian, and it's been a dog's age since I set foot in a church, but I am deeply enamored of the cultural and historical significance of the holiday. (Plus I get to redecorate and give presents, and who doesn't love that?)

I'd love to go all out, but we are still largely a construction zone, so there's less mistletoe and more sawdust. But at least we have our tree!


Jesse and I have a longstanding tradition of getting the absolute largest tree that will fit in the space. In the apartment, one had to squeeze around the tree to get to the couch. That suited us just fine. This year is no exception. We have nine-foot ceilings, and I had to saw a good 8 inches off the bottom of the tree to get it upright. And then, we had to run out and buy a bigger tree stand, because it wouldn't fit in our old one. Three stores later, we found a suitably large one at Home Depot, proving once again that even if you don't think Home Depot is the answer, Home Depot is always the answer. 

And then I put 1200 lights on it, and it still has dark spots. (Good thing I had help putting up the lights.)


I also put up a couple of garlands, but that's the extent of our decorating. 


****

There are 8 shopping days before Christmas, and while I'm usually way ahead of the game in my holiday preparations, this year I am falling behind. I usually start compiling a gift list in August or so, but I'd gotten completely absorbed in the kitchen remodel, and forgotten about the list until...last week. Thank god for Amazon Prime. So now I have all of my gifts purchased, but not assembled. I really should have done that yesterday on my day off, but the cabinet uppers were a much more exciting pressing project.


It took two days of materials gathering (mostly because I didn't realize I'd bought the wrong sawblade, and thus ended up back at Home Depot, and then I needed lunch, and then we went to the grocery store, etc etc) but after a full day of construction, the cabinet boxes are UP, and MOSTLY STURDY and I LOVE THEM.


Coincidentally, my table saw is perhaps the best $300 I've ever spent. (Thank you, Black Friday.) I could NEVER have gotten these done - not as fast, and certainly not as square - without it. Also, it's incredibly satisfying to suck up seventeen pounds of sawdust with the Shop Vac.

So the boxes are done. I thought maybe I'd get around to priming and painting last night, but that was nixed in favor of eating pizza and playing video games. I did pick up a gallon of Benjamin Moore Advance in Super White, which I'm very excited to use. It's a new formulation of paint known as alkyd - it has a lot of the durable, slow-drying properties of oil-based paints, but it's a water-based latex so it's much easier to clean up - and it's supposed to be excellent for cabinets. Normally I'd use whatever mis-mixed paint I'd gleaned from the clearance section, but since cabinets and kitchen cabinets especially are high-traffic and high-impact, I wasn't about to skimp on coating. We'll see how it turns out.

One roadblock I've been working through is the cabinet door design. In a perfect world, I'd have a single, flush-mount full-length vertical door for each section, with an old-fashioned latch.


While I could have modified my cabinets this way, I feel like I've pushed the structural envelope of the original cabinets enough just by putting in the uppers. Would they be fine if I cut away some of the horizontal fronts? Probably. Do I feel like risking it? Nope, not really.

So that means I either give up latches or give up full-length doors (since the latches need the doors to be flush), or come up with a third solution. And since I hate compromising, I've been brainstorming like crazy, and I think I've finally found the answer:


Source: Pinterest

It's a little hard to see with this picture, but it looks like the doors are latched to each other (removing the need to be flush). This is totally doable in our kitchen; doors without "latch buddies" will get simple knob handles. 

The other thing I need to decide is which doors get glass fronts. Apparently you can just buy glass panes for $1-$5 a piece at (where else) Home Depot, which blew my mind. There's also a glass-cutting shop just up the road, which could also facilitate window-doors. Making the cabinet doors themselves is no problem - or at least, it won't be if I want them, because there's no way I'm buying custom-made windowed cabinet doors at $100 a pop. I just need to do some hard thinking about whether or not my spices stay organized enough to display. There's also the option of some DIY faux leaded or stained glass, which I'm also considering.

Something like this will suit me just fine:


The kitchen is THIS CLOSE to being done, which is both awesome and daunting. I am salivating at the prospect of well-organized cabinets, but will it be done in time for a massive batch of Christmas gingerbread? We'll see.

****

And if Santa is reading this, I really want a living footstool Great Pyrenees for Christmas. (Even though I need another giant furry animal in my life like a moose needs a hat rack...)


Source: Pinterest


Friday, December 5, 2014

Giving Thanks

One of my New Year's resolution for 2015 is to set up a regular blogging schedule and stick to it. Fortunately for me, it's still 2014, and I can therefore be forgiven for not posting often. 

I feel like I say this every time, but holy cowcats, we've been busy. 


When was the last time I posted? Almost a month ago. WELL THEN. 

So, first of all, our very beloved friends Faith and Janet got married - they've been together 27 years, it's definitely time they tied the knot - and it was the most beautiful thing I've ever seen in my life. Their fantastic son Riley officiated, and it was an epic amount of perfect. Guh. 

THEN it was suddenly Thanksgiving, and we HOSTED, and aside from flooding the kitchen with two gallons of turkey brine* and then almost setting the table on fire** it turned out pretty much perfect. 


Mom, Dad, Grandma and Grandpa arrived much earlier than I was expecting, and then Mom and Grandma took over the kitchen, so despite being the supposed host, I really didn't have to do much beside stand around and look good. (Well, sort of good. I'd carefully curled my hair earlier in the day and then promptly flattened my fancy 'do with my rain hood during a last-minute coffee run. EW.)

The turkey, despite having been abruptly de-brined* and then flash-cooked - wow, electric roasters take SO MUCH LESS TIME than ovens! - was delicious. Especially when carved up by Incredible Builder Dad.


Does that bird look done? Yes, yes it does. 

Jesse and I managed to get the house into some semblance of a reasonable living space, which included my last-minute projects: the window seat in the kitchen and reupholstering the extra dining room chairs. 


I only post pictures of chaos like this because Pinterest makes everything look pretty and easy. Nothing is pretty until it's done, and maybe it won't be pretty even then. (I mean, I'm still picking bits of upholstery foam off my sweaters and out of the cats' tails.)


Ta daaa! Window bench! (Still needs trim. Snd paint. And curtains. Martha Stewart, avert your gaze.)


I would like to point out that only one of these projects was hard. The chairs were so easy - just unscrew the seat, wrap the new fabric around and staple into place. In fact, I did all four chairs while also deep-frying an experimental batch of hush puppies for our office chili contest. All things considered, the hush puppies were the more difficult (if markedly more delicious). 


It was kind of strange to see our place all dressed up for the holiday. I randomly threw together a bunch of decorations I'd already had on hand, and I think it turned out really well.


And I made a chandelier-thing! Version 1.0 was held up with those temporary peel-and-stick command hooks, two of which fell down the next day and the additional four of which took the paint right off the ceiling. Version 2.0 is held up with actual, official hooks. We'll see if I can handle dusting it. (haha, like I dust...)


Aww, the living room almost looks finished. 


We even turned on our cheesy fake fireplace. 


And then we feasted!


This photo was taken immediately after the leaf incident** that very narrowly ended up with the table not on fire. 

Predictably, Sass spent the entire day hiding upstairs, but Pecan managed to charm pets and table scraps out of almost everyone.
  

It's been a very material-oriented year, necessarily so with the house purchase, because materials are required for remodeling, and remodeling itself is a very appearance-oriented activity. It's easy to get caught up in the swirl of decision-making, and with Pinterest available 24/7, it's even easier to feel inadequate about design choices I've made or the amount of money I make. 

Above everything else, I am incredibly grateful to have a roof over our heads, and to have enough space to host the ones I love. I am grateful to be building a home with the man I love, and I am constantly humbled by his love and support of me and my occasionally harebrained ideas. I'm grateful to be in a financial position that allows us to transform a blank slate into a beautiful home, and I'm grateful for the patience of my friends and family who have to hear my endless rambling about my latest obsession project. I am incredibly lucky, and I am grateful for all of it.

****


Once the family had dispersed, it was time to spend the rest of the long weekend trying to finish Dragon Age: Origins because Inquisition came out last week and aaaaalll my coworkers are playing it decorating for Christmas! Which naturally meant buying a ladder, since the only one we have is a rickety four-foot stepladder that I'm okay with but makes Jesse very nervous. So we braved the Black Saturday crowds at Home Depot to come back with a 24-ft extension ladder and what felt like an inadequate amount of lights.


Gung-ho to channel my inner Tim Allen, I rapidly discovered the reason that some people leave their roof lights up all year long: heights are freaking terrifying and the roofline is MUCH higher than it looks from the ground. 


Being the practical human being he is, Jesse drove us back to Home Depot for a stabilizer, which made things fractionally less terrifying. 


Jesse groomed our lawn, and I commenced decking the halls. As Dad pointed out, we're one golden retriever away from suburban bliss. (DON'T TEMPT ME, DAD.)


Also, it started snowing. 


And it was ridiculously cold and windy.


But the end result was worth it. 


Onward to Christmas!

* Let's not talk about this. Suffice to say that if one is brining in a bag, the bag should be sufficiently sealed before trying to stuff it into an already-crowded refrigerator. Words of wisdom, right there. 

**We're definitely not talking about this. 

Thursday, November 13, 2014

Blinded

We're in the throes of Snowpocalypse 2014 here in Portland - and by that, I mean at least three snowflakes were seen somewhere in the northern half of the state in the last twenty-four hours - and predictably, all the projects I suddenly have a hankering to do involve things in the garage, and there are four very icy deck steps between here and there, so...here I am, indoors.  (I'm not keen for a repeat of February's ice-related knee injury, which laid me up for three days, although being confined to the couch and playing video games certainly isn't the worst way to spend a long weekend.)

It's probably a good thing I'm kept indoors tonight, because there are a million indoors-related projects that need finishing. Case in point, I organized part of the craft room, unpacked a couple of boxes, rescued all our winter jackets from the basement, and did a bit of arranging in the guest room. 

It can be argued that paying the mortgage on a home is one of the most grown-up things you can do, but mostly, I've been vacillating between feeling like I'm just playing house and the guilty exhilaration that comes from demolishing and then building something permanent in a structure. (An emotional holdover from all the years of renting? Maybe. It's a bit of a paradigm shift to go from "Oh shit, we're never getting our deposit back" to "These improvements build equity!") It doesn't really help that there isn't a single room in the house that feels done yet, at least not to the point where I can sit back and be relatively satisfied with the layout and decor. 

One thing that has helped immensely are the blinds. Typically, they were a complete hassle to obtain - they were backordered for a month, and then when they finally arrived, I discovered I'd ordered the wrong length because I'm an idiot who only measures width, so back they went - but oh, how they make things feel a little more grown-up.


Yeah, the window trim hasn't been painted, and I haven't put up any curtains yet, but it's still SO MUCH BETTER.

When we moved in six months ago (wait, what???) one of our very first Home Depot purchases was a pack of fold-up paper shades, which we've been grudgingly living with ever since. Like with everything else, I have strong opinions on window treatments (surprise) and I knew we absolutely had to have the 2-inch blinds. After living with cheap plastic blinds for years and hating them, the 2-inch ones feel much more sophisticated (and will probably be easier to vacuum cat hair off of). I finally scored the blinds I wanted from JC Penney, which despite my measuring mishap has been absolutely the best place to shop. The blinds in question seem to be perennially 50% off, and when I ordered then, I scored an extra 20% off from a random weekend sale, making them significantly cheaper than Home Depot or online retailers. They're also decently well-made for the price, with metal gears and the movements feel very solid. Plus, when I realized my measuring mishap, I took them back to the store and discovered they have free direct-to-home shipping for returns. Awesome! Now we have light, privacy, and fancy blinds.


 It's very weird, though, how one's definition of "reasonable" changes upon signing the closing papers. If you'd told me I'd spend $180 on blinds for eight windows, I'd have laughed like crazy, but now it seems like a total steal. In the apartment, if I'd gone to Home Depot for a $5 can of spray paint or something, that's what I'd get, and I'd be done. Now, if we get out under $100, it's a cheap trip. (And I've probably forgotten like four things, at least one of which will necessitate a return trip later in the day.)

But it's worth it. Every strange bruise and mysterious cut, the constant layer of grime and the fact that I basically sign my paycheck over to Home Depot every two weeks - it's totally worth it. I love this house. I love working on it. I love figuring out how to get what we want without spending a million dollars. Some of it has definitely been annoying - plumbing, I'm looking directly at you - but it's a huge learning experience, and I love it, and every so often, I'll catch a glimpse of what it's going to look like when it's all done, and it looks amazing. 

For now, we're still covered in sawdust and eating pizza more nights than not, but at least we've got fancy new blinds.


Tuesday, November 4, 2014

Kitchen, now with 50% more grout!

It's election night, and instead of constantly refreshing the Google elections results, I'm electing to stare at my gorgeous new tile.


I finished the last bits of tile Saturday night, just in time for us to host a houseful of wonderful people for our friends Faith and Janet's surprise wedding shower. It went off without a hitch - there was so much love in our house I'm surprised it didn't float off the ground - and I am very pleased to know that there is PLENTY of room to have twenty lovely people hanging out with us. It was a great trial run for future holiday gatherings. 

Yesterday I spent four hours grouting and scrubbing the grout, but the extra time and effort was totally worth it. Those lines are PERFECT. I used the leftover charcoal gray grout from the floor, and it really makes the tile pop. I also glued the poor broken corner back onto our beautiful sink, and we will never mention the sink incident ever again. 

Seriously. Look at this:

  Before (with drywall - please ignore my haphazard, paranoid screw patterns)

  During (so grout. such mess. very tile)

I was not expecting tiling a wall to be such a pain in the ass. My tiles were sliding everywhere. Finally, I figured out that applying the grout and allowing it to dry for five or six minutes made it much stickier, and then the tiles would stay (mostly) in place.

And now look at it!


 I'm still not convinced the light over the sink should stay white. I'm strongly leaning toward spray-painting it a matte black right now, but I'm committed to living with it awhile, as my wise project manager husband suggested.  

Originally, I'd planned on painting the upper cabinets white, and staining the lowers with my favorite Minwax red oak, but right now, I'm kind of loving the juxtaposition of the wood with the crisp white subway tile and the dark industrial concrete. The 80s varnish absolutely has to go (it's not in very good shape anyway, and the cabinet doors especially are pretty rickety) but I'm starting to think having that rich, warm reddish-brown wood on the upper cabinets as well as the lowers would look pretty fantastic. (Plus, it would save me from having to paint, and given a choice between staining and painting, I'll choose stain every time.) My next project is the window seats by the back door, so I've got plenty of time to mull over my options. 

Happy belated Halloween! We had 59 trick-or-treaters come to our door, which was more than I could ever have hoped for. It was perfect - most of the kids were some form of zombie, and most of the costumes were home made. I love our neighborhood!!


Wednesday, October 22, 2014

That sinking feeling

(Apologies, this post was SUPPOSED to go live before our trip to Alabama last week, but the faucet was STILL LEAKING so I couldn't post without finishing my project. Humph.)

So...the kitchen faucet sprang a leak and we decided to remodel the whole room. (I'm using the royal we, in case you were wondering.)

Let me back up. I came home from work a few weeks ago, and went to get a glass of water, and ended up with wet socks. (Never a good feeling, that.) The culprit? The cold water side of the kitchen faucet. Jesse was out with friends, so I was home alone with a potentially major plumbing issue. I did what any self-sufficient adult would do: I panicked and ran to Google. 


This army is run by General Issues.


The first order of business was to turn off the supply lines to the faucet itself, which the internet helpfully noted would be under the sink. Except when I looked, there weren't any valves on the supply lines under the sink. After further investigation, I found the cold water valve on the ceiling in the basement, but the hot water valve was...nowhere. So the next logical step was to turn off the water at the hot water tank. 


Helpful plumbing assistant Sassafras.

Because our house is a carefully-assembled series of "What the hell were they thinking?!" constructions, I was (mostly) not surprised to find out that there IS no hot water cut off valve at the tank. Yep, there were 40 gallons of hot water between me and a replacement gasket. So I did the obvious next step: opened myself a beer and called my mother. 

The consensus was that we needed a plumber. Since the leak was contained (cold water was off, horrible warning taped on sink, Jesse warned via text, etc) it wasn't an emergency situation. The next morning, I called the best plumber Angie's List could recommend, and the scheduler helpfully noted that the first available appointment was October 6th...ten days away. 


Well, it's not like we've been cooking much anyway. I took the appointment, and resolved to make room in the laundry sink for dishes. 


THE SINK

In the meantime, there was an IKEA sink somewhere in transit, slowly making its way to my waiting arms. This sink is the pinnacle of my kitchen remodel hopes. 
The IKEA Domsjo double-bowl. It's huge. It's lovely. I need it.


Our kitchen is expansive. Our sink is currently cast iron and lemon yellow, which is cute, but not really the look I'm going for. 


My decorating technique has always been to figure out what I like, and then to figure out how I can get it. (Or at least recreate it, which is often the tougher task, since I unfortunately have very expensive tastes.)

My Pinterest board is full of kitchens like this:


Source: Pinterest, that beloved timesuck

What do these gorgeous kitchens have that ours does not? Cabinets to the ceiling, and farmhouse sinks. There's a gross soffit above our cabinets, but hey, I can remove that. The issue I was running into, however, was that sinks? Are really really freaking expensive. Like thousands of dollars expensive. So when I found the IKEA Domsjo for $300, I almost died. And then I really did almost die, because it wasn't in stock. 

Turns out, there were some supply issues with the double-bowl Domsjo, and for almost a month, I had it saved in my online shopping cart, biting my nails because it was no longer posted on the website and looked very much like it would be discontinued. The first paycheck I could afford it, I sprang, and my giant sink began lumbering on its two-week journey across the country. (Apparently Boston was only place that had it in stock.)

This story ends happily, though, because I have my fancy sink, and it's now back in stock at my local IKEA, so everyone else can have a fancy sink, too. 


THE REMODEL

When I ordered the sink, I didn't really have a plan, besides "OH GOD IT'S ONE THIRD THE PRICE OF ALL THE OTHER SINKS AND IF IT GETS DISCONTINUED I WILL CRY BUY IT NOW BUY IT NOW!!" (All you advertisers, take note: the scarcity argument actually works.) Then, our faucet broke, and suddenly our sink was due to arrive two days before the plumber. And suddenly it made sense to install a new faucet sink with the new sink. And since the sink was going to be replaced, I could redo the counters like I'd been wanting. And if I was going to redo the counters, I might as well take down the soffits beforehand, so falling drywall wouldn't damage the new surface. 

It's a slippery slope over here at Left of Center, but I managed to convince my project manager (aka Jesse) that it would in fact be worth it.

I started my three-day weekend with the joyous arrival of The Sink. Much crooning ensued.


Seriously, that is the biggest box in the world.

And that box contained the biggest sink in the world. 
IT'S SO PRETTY I'M GONNA DIE. 

Then, the soffit demolition started. 


Safety first!

Being the crazy person I am, I'd researched everything I could find about soffits prior to demo. The internet indicated that almost all soffits were just a simple frame and drywall. 

That is not what I found.


Yep, that's drywall over 1/2 inch plywood, which is covering up...a heating duct. WHO BUILDS SOFFITS OUT OF PLYWOOD? I was not warned about this. 


The best part? The soffit wouldn't even have been necessary if the original builders had put the heating duct eight inches higher. Yep, they sacrified something like 30 square ft of potential cabinet space because they didn't feel like moving the duct. 

I called Incredible Builder Dad. His sage advice was to put the drywall back up, and then wait a year or two for when we could take the kitchen down to the studs. 

Sorry, Dad, I'm pretty sure you said, "Use the reciprocating saw and do it now."

It was gross. Like, beyond gross. The entire soffit apparently served as a mouse superhighway for the last thirty years, and I was SO GLAD for my super filter mask because YUCK.


Here, speaking of filters, have an artistic shot of the chaos. Yes, I did also pull down the wall next to the furnace chimney. Why? Um, it was easier than the soffit. Also, it was there. Jesse wasn't home. Did I need a reason?


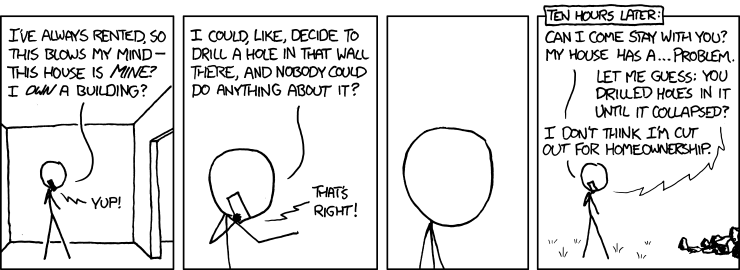
I'm pretty sure the author of xkcd is watching me on hidden cameras.

Finally, after two crazy days of kitchen demo, the soffits were out, the heating duct was duly adjusted, and it was time to do the countertops. 

If money were no object, I would have put in soapstone. It's gorgeous and patinas nicely. You can sand out scratches, it's non-reactive, and so much more user-friendly than granite or marble. From everything I've read, it's very much a "living" surface, one that changes over time and ages with the house. 


Source: Pinterest

Except not only is soapstone very very expensive, it's almost impossible to source on this side of the country. Apparently it's easier to find on the East Coast, where it's a much more common material, but here on the left coast, you have to special order it, which makes it even more expensive. And we have a lot of counter space. It just wasn't going to happen, at least not in this decade. 

In the meantime, our countertops were navy blue laminate, and although they were in mostly usable condition, it wasn't very pretty. I'm a superficial person, I need it to be pretty. I mean, with our gorgeous new sink, the entire kitchen needed a makeover.

After extensive research, I discovered a technique online where I could skimcoat the existing laminate with a concrete-like product called Ardex Feather Finish. By adding black concrete pigment, I could approximate the color and texture of the soapstone I wanted, for a fraction of the cost.

The entire process of skimcoating was 100% easier than I expected. Because some of the laminate was peeling, I added a layer of 1/4 inch backerboard to all the countertops, so the Ardex had a perfect surface to adhere to. Each layer was supposed to take 15 minutes to dry, but it ended up being more like 12 hours; I was being enthusiastic about putting it on.


I could have gotten away with one or two layers of the Feather Finish, but I wasn't achieving the charcoal color I wanted, so I ended up doing four layers, with the proper color ending up being one bottle of Quickrete charcoal concrete pigment per box of Feather Finish. 

Once the final layer was dry, I sanded it first with 60 grit sandpaper, to knock down all the large lumps, and then 120 grit to polish it up. I was supposed to sand between each layer, but I'm lazy, so lumps from the earlier coats ended up showing through the final coat. The effect actually looks like striations in real stone, so that was a pleasant surprise. 

 
Yep, that's my ShopVac taped to my orbital sander. A poor girl's dust reduction system, if you will.

The end result is fantastic. I love it, and it's so much better than what I could have hoped for. The texture is very much like honed stone, and there are just enough imperfections that it won't be too much of a tragedy the first time I drop a heavy bowl on it. 


Right now, it's got two coats of 511 Impregnator Sealer on it to prevent staining and make it water-resistant, so it's darkened up quite a bit, and when that's cured in a day or two, I'll put on two or three coats of Minwax Polycrylic on it to prevent scratches. I use Polycrylic to seal all of my projects - including the kitchen table I refinished at the old apartment - and I've never once had an issue with scratching or peeling, and once it's cured, both it and the Impregnator are food-safe.

So. Counters are done. Time to install the gorgeous sink!

Before I'd done the Feather Finish, I'd made a template of the sink from the sink box (carefully tracing around the edges of the sink to ensure proper fit) and cut the counter to size. It should have been perfect...except it wasn't, as I am coming to realize about this house. We couldn't get it in. So we pulled it back out, and sawed some more off the edge of the cabinets, and tried again.

Still nope. So out it comes, and we saw some more off, and that doesn't work, so we cut from a different area, and that STILL doesn't work. I MEASURED THE DAMN SINK. ITS CARDBOARD TEMPLATE HAS AN INCH OF SPACE AROUND THE EDGE! There is NO REASON this sink should not be fitting, except it just. WON'T.

We haul it back out - keep in mind that this sink weighs more than I do - and I hack quite a bit off the cabinets. 

I'm pretty sure the N is for NOT FITTING.

At this point, it's getting close to 9pm. We both have to be up by 6am, and I, for one, would REALLY like to shower and get the countertop dust out of my hair, but the water is still off because the faucet is disconnected, so we can't. So we try to wiggle it in place one more time.

And then this happens:


In case you can't tell, that's the corner of my beautiful, brand new sink, no longer attached. I almost cried.

That's when we decided to call it a night.

The next day, we inspected the damage. It turns out that with a little epoxy, the crack will be almost invisible, and the sink itself isn't structurally damaged. After way too much finagling, it is, at this point, precisely level and more or less in position.

THE FAUCET

After the ordeal of the sink, I thought the faucet would be fairly straightforward. Oh, how innocent I was.


Jesse and I had spent the better part of the week prior trying to find a faucet we liked. Our options were limited by a) budget and b) the single hole in the Domsjo. I really wanted something in a warm, classic brass, but in the end, we settled on a Hjuvik from IKEA. It wasn't the cheapest, but it was big enough for our giant sink, and it felt much more sturdy than comparable models at the plumbing store. Plus, it came with a 10-year warranty, and warranties are good, right?


 The inspiration, via Pinterest.

 The reality, via IKEA.

It turns out that most IKEA faucet supply lines do not connect up with American plumbing without a little help. The supply lines were 3/8", while the lines from the wall were 1/2". After reading many horror stories online about Frankensteinian DIY line connections, we ended up just finding a couple of 3/8" to 1/2" adapters at Home Depot. While we were there, we picked up a few extra parts for the drain assembly, since I'd been wrestling with the stupid garbage disposal for the last few hours and couldn't seem to make any headway.


So we got home, and managed to cobble together the drain pipes, with no small amount of silicone goo. Then, we hooked up all the supply lines, and discovered that they both LEAKED. And not just a little bit. We took our degraded gaskets to the plumbing store down the street, and were told that not only did they not carry that size, we'd have to run entirely new line. Yes, we will eventually, since we've got polybutylene lines that are no longer up to code, but we were flying to Alabama the next day for a weeklong vacation, and our sink was still dripping a quart of water every few hours. (And remember, there is no water shutoff. Even turning it off at the curb didn't seem to make any difference.)

Long story short, I gobbed everything up with approximately a pound of silicone goo, and then we left on vacation. (That's another post for another time.) While we were gone, I ordered some assorted gaskets from Amazon, and they were waiting for us when we got home. Tonight, I spent three hours with my head under the sink, carefully putting everything back together and chasing drips around, but we've finally done it. 

We're not going to win any prizes for beauty, but the faucet works, the drain works, and nothing is leaking (knock on wood).


My gorgeous sink is installed and functional, and we can FINALLY go back to taking hot showers without having to go to the basement to turn the water on first. Plumbing would be SO MUCH EASIER if it didn't involve water.


 Whew. Now I'm going to bed.